Tuesday, December 6, 2011
Chicken and Wild Rice Soup
This recipe is from Lyn Schafer at Classic Floral Design in Waukee. She was gracious enough to make 18 gallons of this soup to share with the community to help celebrate our annual Winterfest celebration. It was so good, I needed to make some for myself. The recipe has lots of different steps so it did take me a while to get it put together the first time but I always allow double time to make something on my first try. I added some helpful tips at the bottom in hopes that your first attempt won't be as disorganized as mine. Thanks for the soup, Lyn!
Chicken and Wild Rice Soup
1 box Uncle Ben's wild rice mix
8 oz. cream cheese cubed
1 can evaporated milk
2 to 4 chicken breasts, cooked and cubed or shredded
2- 15 oz. cans chicken broth
1 cup chopped carrots (into bite-sized pieces)
1/4 onion - chopped
Make rice per box instructions. While rice is cooking, chop onions and carrots. Saute onion in small amount of oil until tender. Add carrots to onion and saute for about 5 minutes, stirring every few minutes so they don't burn. Boil, bake or grill chicken (however you choose to cook the chicken). Combine all ingredients into crockpot or large pot. As mixture thickens, you may need to add some milk to thin it out.
Helpful Tips:
This recipe will require 4 different cooking pots/pans. I doubled the recipe and used a 2 quart saucepan for the rice, 12 inch skillet for onions and carrots, 5 quart stockpot for boiling chicken (you could also use leftover grilled or baked chicken) and a large oval crockpot for the soup. With the doubled recipe, the soup barely fit in the crockpot. If you make a single batch, it will fit in a 5 quart stockpot on the stove.
If you are using a crockpot, you can put the broth and cream cheese in first to start melting the cream cheese. You will need to stir and smash the cream cheese against the side to get it all mixed in so it may be easier to get it started melting before adding other ingredients.
Alternate way to do the chicken and broth: You can get bone-in chicken and add 8 cups water when boiling and then use the broth you've made for your chicken broth. This will not work for boneless skinless chicken because you won't get the flavor you need.
I am not a big fan of onions but this was fine. I probably could have used more onion and I still would have liked it.
A double batch makes a huge amount of soup so I hope it freezes OK. I'll update on how well it comes out of the freezer.
If you try it, let me know how you like it.
Friday, September 2, 2011
Homemade Tortillas


Some tips:
1. You need to use freshly milled flour - we tried a comparison with white flour and the white tortillas actually shrunk immediately after pressing so they were really small and thick. I haven't tried whole wheat flour from the store.
2. Use saran wrap to cover the press so the dough doesn't stick to the press. You can just peel the plastic off the tortilla. You can use the same plastic over and over for your batch.
3. They are best eaten immediately. We do make enough for leftovers for an extra meal but they aren't as good. Re-grilling them does help somewhat.
4. Allow about an hour for prep time. You can chop up tomatoes, etc. while the dough rests.
5. Enlist the help of your kids or another family member. They can press while you throw them on the grill.
6. I use a countertop pancake griddle so I can grill them almost as fast as my daughter can press them. It takes about 3 minutes on each side.
Tortilla pressing is so easy! If my 5 year old can do it, so can you! Laura pressed all 20 tortillas one night for dinner and loved being a helper in the kitchen.

Saturday, March 19, 2011
Birthday Treats
Today was my husband, Darwin's birthday. Of course, we had to celebrate with favorite foods. Laura made lasagna (yes, this recipe is so easy, I just gave her the ingredients and she put it together - it is the Costco ravioli lasagna recipe.


You might have noticed that Laura's hair is MUCH shorter so I am including a "before" picture for comparison. We cut 9 inches off this week and it looks very cute. I would have loved having long blond hair when I was a kid but she really wanted it cut and I am happy to not have to deal with tangles anymore. We are sending her hair in to Pantene for their hair donation program so someone battling cancer can enjoy her hair now.
Laura also helped Darwin in the garden today so she was a busy girl today. Meanwhile, I made a chocolate zuchinni cake (his request). I used 1/2 cup dark cocoa, 1 cup of fat (half oil, half butter), farm fresh eggs, and freshly milled flour. Luckily we still had frozen zucchini from last year. The cake was so chocolaty that it was almost black and it was so good that it needed no frosting. This is the recipe I used:
http://www.epicurious.com/recipes/food/views/Chocolate-Zucchini-Cake-907
I used 9 oz. milled soft white wheat and sifted the flour. I do need to get a finer sifter to remove more of the larger pieces for baking cakes and cookies however this cake did just fine with a regular sifter.
Monday, March 7, 2011
Comfort Foods at the Tangen House
I love going to Living History Farms. They have a full scale replica of a typical 1875 town complete with real shopkeepers and other interpreters to explain what life was like in 1875. Our first stop is always the Tangen House. This is an upper middle class family home with a beautiful kitchen that most pioneer women would be grateful to have at that time. Whenever I visit, I am reminded how easy we have things and how we need to simplify our lives. I have always thought it would be so fun to actually cook a meal there instead of just watching.

Last week I was able to fulfill my dream of cooking in the Tangen House when I took a cooking class there. Our class of 5 students plus our teacher, Allison, cooked a full meal on the wood burning stove using only the kitchen tools commonly available in 1875. Our menu was beef and noodles, chicken and dumplings, rice pudding, biscuits with butter and jam, and apple crisp with whipped cream. Is your mouth watering yet?
We divided up the tasks between us. I made the noodles. Since this was my first time making noodles, it took me a while. Next time I will know to use more flour on the counter so they don't stick. The proper way to dry them is to hang them over a rod on the back of the woodburning stove but they felt like they were going to fall apart if I tried hanging them so we used a cookie sheet next to the stove and turned them over after the tops were dry. My noodle making seemed to take a long time so it was good that there were 5 other cooks in the kitchen to make everything else. This would have been a big job for one person. Everything tasted fantastic - now I want to try the recipes at home to see if I can duplicate them in my kitchen with my freshly milled flour. We used white flour for baking. The wood burning stove probably made the apple crisp and biscuits better since they were baked in the oven. The apple crisp was also baked in a pie shaped stone. Everything else was cooked on the stovetop using cast iron pots. The chicken was pre-cooked when we arrived and I forgot to ask where it was cooked.


We ate in the dining room and it was dimly lit with a few kerosene lamps. To save on dishes, we used paper plates and plastic utensils - not very authentic but since we would be doing dishes in big basins and then dumping the water out the back door, I don't think anyone missed using real dishes. Here is how I rate our menu in order of how likely I will make them again:
1. Apple crisp -really good and really easy
2. Chicken and dumplings -really good but more work than apple crisp
3. Rice Pudding - good and easy and my husband likes rice pudding.
4. Biscuits - I want to try these with fresh flour - I am not a big biscuit fan but will try again.
5. Whipped cream - really, really good but not sure if I will take the time to do it
6. Beef and noodles - this was good but not fantastic enough to make again - I will try the noodles again and maybe substitute noodles for dumplings with the chicken. That is how my grandma made it. I also need to get the noodles skinnier when cutting into strips. The knife wasn't very sharp so it was difficult to make thin noodles. The noodles plump up so they will be larger than when you cut them.
I loved the class and learned a lot. Most of all, I am inspired to try some new foods at home. I was not able to make all the foods myself since we split up the tasks however we went home with all the recipes so we can try them on our own now. When I try the foods at home using freshly milled flour, I will post as to whether it made a difference in the end result. If you were in the class with me, please post a comment if you tried any of the foods at home and if you have any tips for the other dishes.
Living History Farms is open for their regular season on April 30th. I can't wait to go back!
http://www.livinghistoryfarms.org/

Tangen House - Summer 2010
Last week I was able to fulfill my dream of cooking in the Tangen House when I took a cooking class there. Our class of 5 students plus our teacher, Allison, cooked a full meal on the wood burning stove using only the kitchen tools commonly available in 1875. Our menu was beef and noodles, chicken and dumplings, rice pudding, biscuits with butter and jam, and apple crisp with whipped cream. Is your mouth watering yet?
We divided up the tasks between us. I made the noodles. Since this was my first time making noodles, it took me a while. Next time I will know to use more flour on the counter so they don't stick. The proper way to dry them is to hang them over a rod on the back of the woodburning stove but they felt like they were going to fall apart if I tried hanging them so we used a cookie sheet next to the stove and turned them over after the tops were dry. My noodle making seemed to take a long time so it was good that there were 5 other cooks in the kitchen to make everything else. This would have been a big job for one person. Everything tasted fantastic - now I want to try the recipes at home to see if I can duplicate them in my kitchen with my freshly milled flour. We used white flour for baking. The wood burning stove probably made the apple crisp and biscuits better since they were baked in the oven. The apple crisp was also baked in a pie shaped stone. Everything else was cooked on the stovetop using cast iron pots. The chicken was pre-cooked when we arrived and I forgot to ask where it was cooked.

Noodles Drying by the Stove
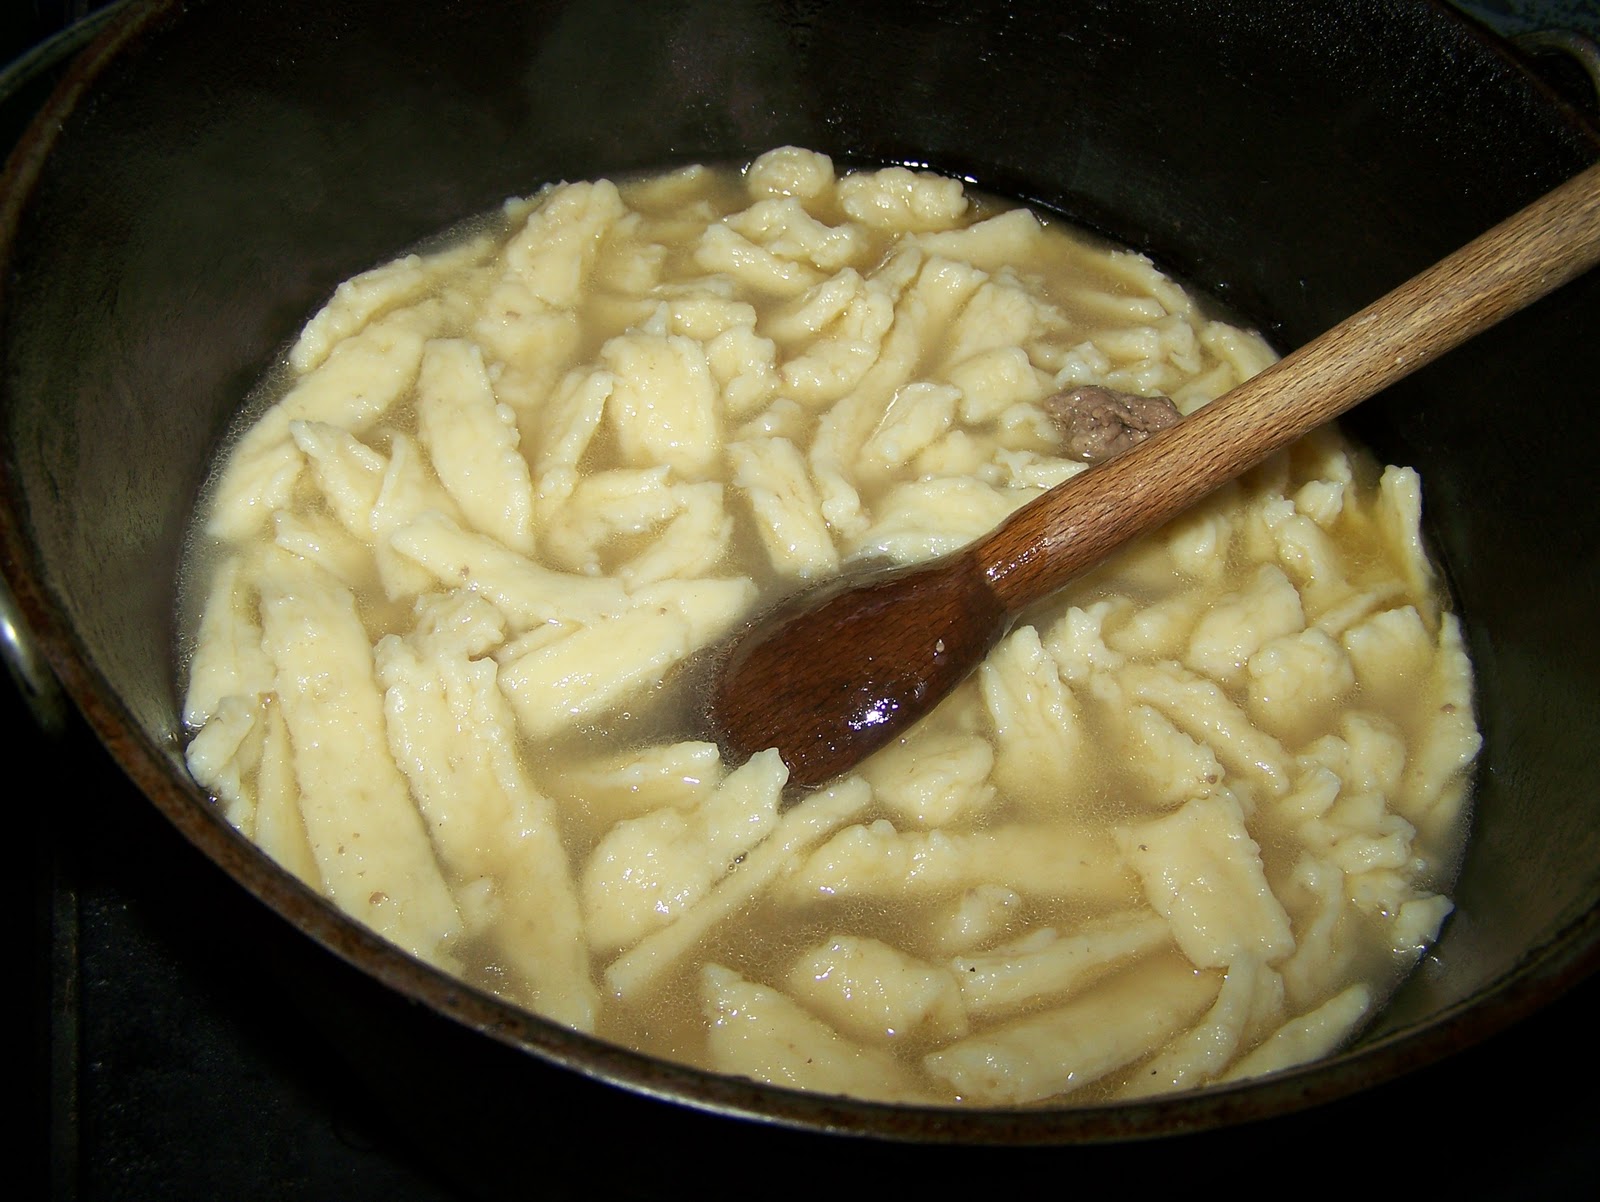
Beef and Noodles

Whipped Cream, Biscuits and Rice Pudding

Apple Crisp

Our teacher, Allison
1. Apple crisp -really good and really easy
2. Chicken and dumplings -really good but more work than apple crisp
3. Rice Pudding - good and easy and my husband likes rice pudding.
4. Biscuits - I want to try these with fresh flour - I am not a big biscuit fan but will try again.
5. Whipped cream - really, really good but not sure if I will take the time to do it
6. Beef and noodles - this was good but not fantastic enough to make again - I will try the noodles again and maybe substitute noodles for dumplings with the chicken. That is how my grandma made it. I also need to get the noodles skinnier when cutting into strips. The knife wasn't very sharp so it was difficult to make thin noodles. The noodles plump up so they will be larger than when you cut them.
I loved the class and learned a lot. Most of all, I am inspired to try some new foods at home. I was not able to make all the foods myself since we split up the tasks however we went home with all the recipes so we can try them on our own now. When I try the foods at home using freshly milled flour, I will post as to whether it made a difference in the end result. If you were in the class with me, please post a comment if you tried any of the foods at home and if you have any tips for the other dishes.
Living History Farms is open for their regular season on April 30th. I can't wait to go back!
http://www.livinghistoryfarms.org/
Thursday, February 10, 2011
The Valentine Box
My son, Sam, is in first grade and their assignment for the Valentine's Day party is to decorate a box to put their Valentines in. Last year, as a first time mom to a school-aged child, I completely forgot about it and he didn't even do a box. We were having a really bad year. So this year, I decided we would do something really fun. Sam loves Herbie the Love Bug and agreed that would be his theme. I got all the supplies together and encouraged him to help me. As it turned out, he was sick this week and never felt like doing much of anything. So here is the box that I made. I'm not passing it off as my son's work. I even told his teacher that I did it and thought I did a great job. Here is Sam with the box, just before I drove it over to his school so his classmates could fill it with Valentines while he was home sick today. He is so proud of the 2 heart stickers he put on for tail lights and the one wheel he cut out.

And to go with the Herbie theme, here is his pinewood derby car (3rd place in his den for speed). His dad did this one - we can't have a 7 year old using a saw, spray painting and using graphite, right?? The pink car belongs to my daughter. She got to race in the sibling race and place 4th out of 26 cars! At some point, maybe they can make their own cars.


And to go with the Herbie theme, here is his pinewood derby car (3rd place in his den for speed). His dad did this one - we can't have a 7 year old using a saw, spray painting and using graphite, right?? The pink car belongs to my daughter. She got to race in the sibling race and place 4th out of 26 cars! At some point, maybe they can make their own cars.

Friday, February 4, 2011
Out of the Mouths of Babes
An observation from my daughter this morning... she tells me that she thinks she is the healthiest person in our family because the older you are the closer you are to dying.
Thursday, February 3, 2011
Ladybugs and Unicorns
Yesterday was a snow day for many schools in the Midwest including ours. It is always an exciting day for my 4 year old when her older brother is home from school and she has an all-day playmate. They played all morning and had a great time running through the house making up games while I baked bread.
We took a break from the fun and watched a kids show on PBS about trading up. Some kids started out with a flyswatter and kept trading for better and better items until in the end, they end up with a family 4 pack to a theme park. Sound familiar? Kyle McDonald started with one red paperclip and ended up with a house after 14 trades.
There is something so satisfying about trading something you no longer want and getting something better. The other person gets that same satisfaction. I've traded a toy vacuum cleaner for a beautiful Tommy Hilfiger dress for my daughter. I've traded a bag of flour for a bag of tomatoes - our garden had not produced any enough tomatoes last year and the other person did not have a grain mill. They were both great trades.
My son is jealous of his sister who got a ladybug pillow pet for Christmas. She actually wanted a unicorn. His solution - we took some of his Christmas money and bought a unicorn pillow pet so he can trade her and get the ladybug. That was his idea - he figured he would just get his sister what she wanted and then he could have the ladybug. How sweet is that? They have made their trade and are both sleeping now with their new pillow pets.
Wednesday, January 26, 2011
Homemade Pudding
My mom mentioned the other day that her mom used to make cornstarch pudding so I decided to try it. Wow! It is great and I know exactly what is in it so I feel better about eating it. Surprisingly, vanilla pudding does not need to be yellow - that is just the artificial coloring added to the store bought pudding. It's amazing what we take for granted when we buy pre-made mixes. I used a recipe from allrecipes.com however I changed it as I made it. Here is my recipe:
Flour Girl's Pudding Recipe
2 cups milk
1/4 cup sugar
3 Tbsp. cornstarch
1/4 tsp. salt
1 /2 tsp. cinnamon (optional)
1 1/2 tsp. vanilla extract
1 Tbsp. butter
Mix all dry ingredients in a stainless steel saucepan (including cinnamon if you want). Add the milk and whisk until dry ingredients are dissolved. It is very important that you dissolve cornstarch into cold liquid. If you heat the milk first, you get lumpy pudding. Heat and stir until mixture is thickened but not boiling. To test thickness, dip a metal spoon into the pudding and if it sticks nicely and doesn't slide off, it's done. Remove from heat and stir in butter and vanilla extract. I always use real butter. Pour into serving bowls. Enjoy warm or chilled.
Next time I will try adding some cocoa to the dry ingredients to make chocolate pudding. If you try adding anything dry like cocoa, make sure you add it at the beginning or it won't mix in well later. If you make this, I'd love to hear what variations you do.
For everyone looking for a bargain, making the pudding mix from scratch costs about 20 cents (not counting the cost of the milk).
Wednesday, January 19, 2011
No time to blog or to do baking experiments
My house is a mess as usual so this week I am really going to tackle it and get it under control. I think it is really an attempt to avoid my kitchen/wallpaper/painting project but if it gets my house clean, I'm OK with that. What I really want to do is try making bagels and to make cornbread using cornmeal milled from popcorn kernels but that will have to wait for now.
Wednesday, January 12, 2011
Getting into a Routine
Now that the newness of making my own bread has worn off, I've gotten into a better routine. I try to only bake once a week since it takes up several hours of the day. I freeze all but what we will eat in 2 to 3 days and then get more out as needed. The other adjustment I've made is to almost always just make rolls. They don't take that much longer to make and they bake faster and more evenly than a loaf. They also don't dry out like sliced bread and aren't crumbly. When I need more rolls out of the freezer, I can just grab a few and put them in my bag on the counter. I can't do that with a frozen loaf of bread. Frozen rolls or bread don't last as long as fresh so I only get out what we'll eat by the next day.
I still love the taste of fresh bread using freshly milled flour but I've really tried to limit my time spent on it now. My kitchen is currently torn up as I'm in the middle of removing wallpaper so I can paint. Here is our latest kitchen masterpiece - my daughter and her friend are coloring on the wall before I remove the wallpaper backing:

I still love the taste of fresh bread using freshly milled flour but I've really tried to limit my time spent on it now. My kitchen is currently torn up as I'm in the middle of removing wallpaper so I can paint. Here is our latest kitchen masterpiece - my daughter and her friend are coloring on the wall before I remove the wallpaper backing:

Tuesday, January 4, 2011
Cream Dried Beef on Toast

Subscribe to:
Posts (Atom)